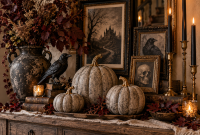
Halloween decorating does not have to mean buying expensive props, oversized plastic skeletons, or boxes of seasonal décor that spend most of the year in storage. Some of the most dramatic Halloween displays can begin with something far simpler: leftover shipping boxes. With the right shapes, paint techniques, lighting, and layering, cardboard halloween decorations diy projects can look surprisingly sophisticated while costing very little.
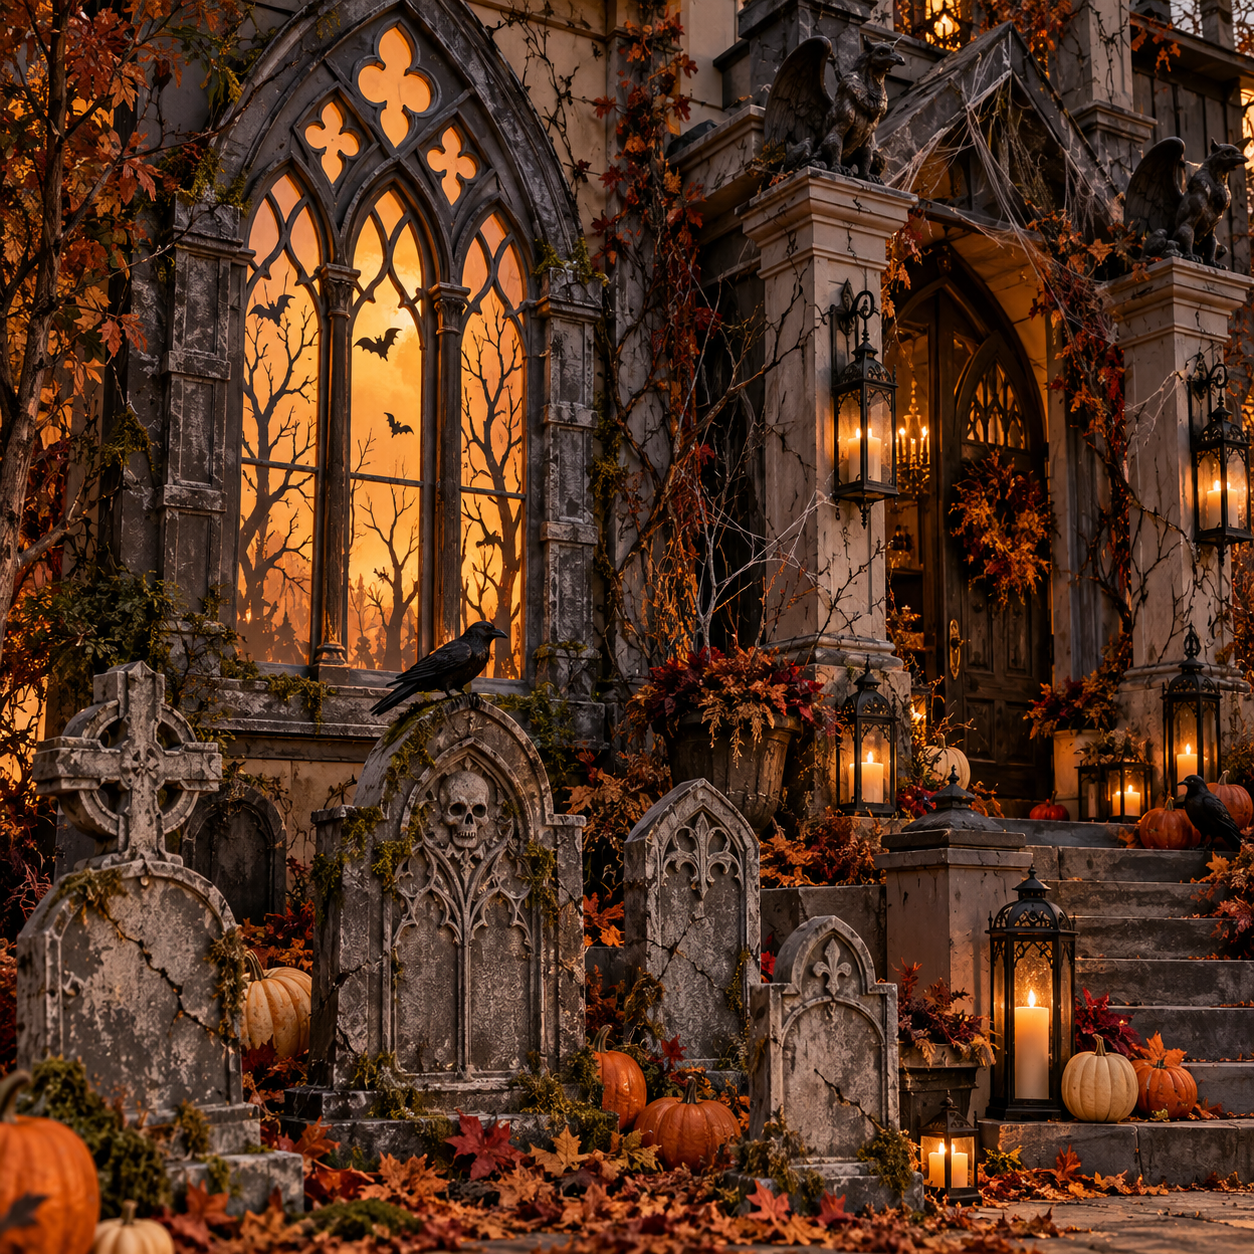
Cardboard is one of the most flexible materials for Halloween decorating because it can imitate stone, aged wood, wrought iron, architectural trim, tombstones, haunted windows, signs, and even large three-dimensional structures. It is lightweight enough to move easily but strong enough for many indoor and protected outdoor displays when reinforced properly.
The real secret is not simply cutting Halloween shapes from cardboard. The best results come from treating cardboard almost like a miniature construction material. Layers create depth, paint creates realistic texture, and lighting turns ordinary pieces into atmospheric decorations.
For a display that feels dramatic rather than homemade in the wrong way, concentrate on a few large statement pieces instead of dozens of small crafts. These three ideas are designed around that approach.
They create maximum visual impact while using inexpensive materials, making them perfect for front porches, entryways, living rooms, party backdrops, windows, fireplaces, or covered garden areas. 🎃
Why Cardboard Halloween Decorations DIY Projects Can Look So Good
Cardboard often gets overlooked because people associate it with children’s crafts. However, professional set designers and prop builders regularly work with lightweight materials for exactly the same reason cardboard works so well at home: it is easy to cut, easy to layer, easy to paint, and inexpensive enough to experiment with.
A flat cardboard sheet becomes much more convincing once several layers are glued together. A simple painted rectangle can become an old stone block when rough texture is added. Thin cardboard strips can resemble decorative architectural moldings. Curved pieces can become gothic arches.
Color is equally important.
Instead of using only solid black and bright orange, choose a more sophisticated Halloween palette such as charcoal, weathered grey, warm stone, deep brown, dusty moss green, burgundy, cream, or muted copper. These colors create a darker and more believable atmosphere.
Lighting then adds another layer of transformation. Warm LED candles, subtle string lights, or low directional lighting can create shadows that make cardboard details appear deeper and more dimensional.
The result can feel much closer to a theatrical Halloween installation than a simple craft project.
Materials That Work Best for Cardboard Halloween Decorations DIY
Before starting the three main projects, it helps to collect materials that can be reused across all of them.
Large shipping boxes are usually the most useful because they provide wide uninterrupted sheets of cardboard. Appliance boxes are particularly valuable for tall decorations.
Corrugated cardboard works well for structural pieces, while thinner cereal-box-style cardboard is useful for decorative details.
A strong craft knife produces cleaner edges than scissors on thick cardboard. Always cut on a protected surface and use a metal ruler whenever straight lines are needed.
Paint does much of the visual work. Matte acrylic paint or leftover wall paint is usually more convincing than glossy craft paint.
Sponges, old brushes, and crumpled paper can help create stone and weathered textures.
Here is a practical starting guide.
| Material | Best Use | Helpful Tip |
|---|---|---|
| Corrugated cardboard | Large structures and backgrounds | Double the layers for extra strength |
| Thin cardboard | Decorative trim and small details | Great for gothic cutouts |
| Craft knife | Precise cutting | Use several light passes instead of one deep cut |
| Hot glue | Fast assembly | Reinforce joins from the back |
| PVA glue | Layering flat pieces | Allow pieces to dry under weight |
| Matte acrylic paint | Base colors and details | Dark matte colors hide imperfections |
| Sponge | Stone texture | Dab several grey tones randomly |
| Black paint | Shadows and aging | Use lightly around edges |
| Warm LED candles | Atmospheric lighting | Safer than real flames around cardboard |
| Wooden skewers | Hidden reinforcement | Glue behind narrow cardboard structures |
| Twine | Hanging decorations | Paint it darker for an aged effect |
| Moss or dried leaves | Natural finishing details | Use sparingly for realism |
Important Note: Cardboard is highly flammable. Use only battery-powered LED candles or cool LED lighting around cardboard decorations and keep finished projects protected from rain, open flames, heaters, and other strong heat sources.
With the basics ready, the most effective strategy is to build one major focal point and then add smaller details around it.
The following three projects work especially well because each one creates a large visual statement from relatively simple materials.
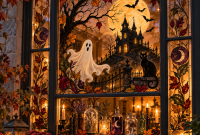
🥇 Best 1 Cardboard Halloween Decorations DIY Haunted Gothic Window
A haunted gothic window is one of the strongest cardboard Halloween projects because it immediately creates the illusion of architecture.
Placed against a wall, inside a real window, above a fireplace, or behind a Halloween table, it can make an ordinary room look like part of an abandoned mansion.
The design looks complicated, but the basic structure is surprisingly simple.
You are essentially creating a large rectangular frame with a pointed gothic arch at the top. Decorative cardboard strips are then added to create depth.
The strongest version uses multiple layers instead of one flat piece.
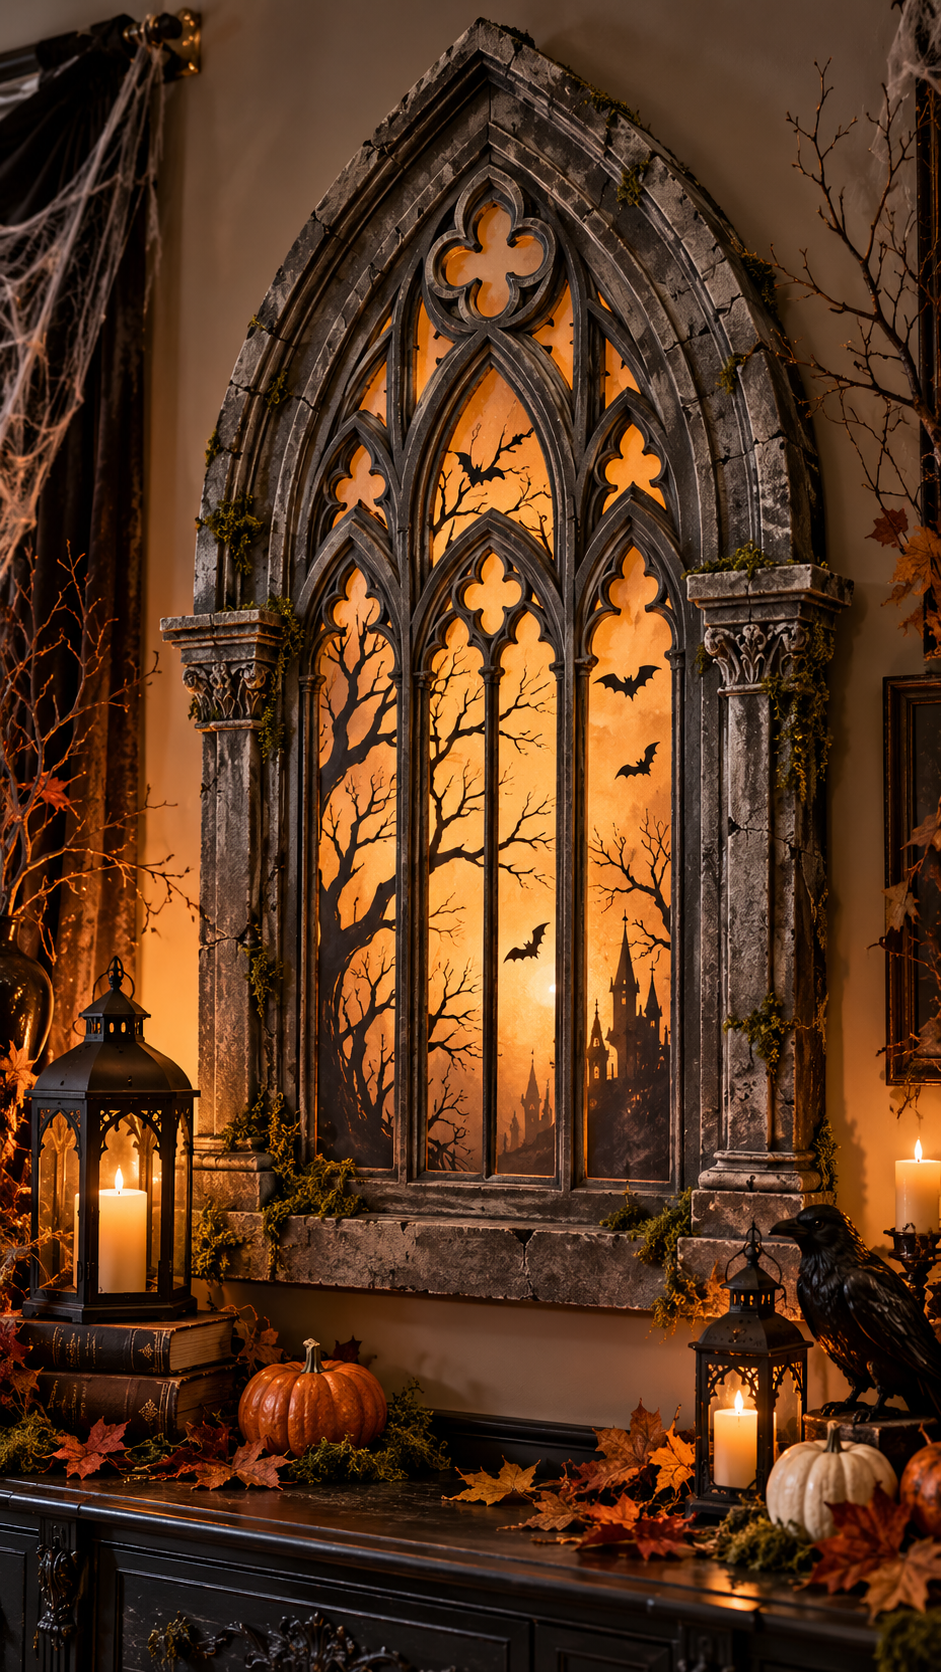
Create the Large Gothic Window Shape
Begin with one large cardboard sheet.
For a dramatic display, aim for a window around 120 to 180 centimeters tall if space allows. A tall shape creates much more impact than a collection of small decorations.
Draw a long rectangular window and finish the upper section with a pointed arch.
A simple way to create a symmetrical arch is to draw one side first, fold a large sheet of paper vertically, trace the curve, and transfer the mirrored template onto the cardboard.
Cut the central opening carefully.
Do not worry if the edges are not perfectly smooth. Slight imperfections can actually contribute to the appearance of old architecture.
Next, create a second identical outer frame.
Glue it on top of the first.
This immediately makes the window thicker and more dimensional.
Add Layered Architectural Trim
The difference between a simple cardboard window and an impressive Halloween prop is usually the trim.
Cut long strips of cardboard approximately three to five centimeters wide.
Glue these strips around the outer frame.
Then create thinner strips for an inner border.
For an even more architectural look, stack narrow layers so that each one sits slightly farther inward.
This creates something similar to carved stone molding.
Small pointed shapes can also be added around the arch.
For example, create tiny gothic peaks from triangular pieces of cardboard and place them along the upper edge.
The entire structure should look slightly exaggerated before painting because dark colors will visually reduce some of the detail.
Make Fake Leaded Glass
A haunted gothic window looks particularly convincing when it appears to contain old stained or leaded glass.
There are several inexpensive ways to create this effect.
One of the easiest is to leave the center open and attach black cardboard strips across the back.
Create vertical and horizontal lines first.
Then add diagonal pieces to form diamond shapes.
A second option is to attach translucent baking paper, tracing paper, or thin white fabric behind the opening.
The pale surface diffuses light and creates the illusion of fogged antique glass.
For a darker Halloween atmosphere, add torn black silhouettes behind the window.
Branches, ravens, bats, or crooked tree shapes work especially well.
Keep the silhouettes irregular rather than perfectly symmetrical.
Paint the Cardboard Like Ancient Stone
Painting is where the transformation happens.
Start with a charcoal or very dark grey base coat.
Allow it to dry.
Then use a sponge to add medium grey irregularly across the surface.
Do not cover the dark base completely.
The goal is to create variation.
Next, lightly dab pale grey over the raised edges.
This highlights the layered cardboard trim.
Add tiny touches of muted green or brown around corners to suggest moss, age, and weather exposure.
For deeper shadows, thin a little black paint with water and brush it into the joins between layers.
Immediately wipe away most of the paint.
The dark pigment will remain inside the recesses.
This simple technique makes the cardboard architecture appear significantly deeper.
Add Haunted Lighting Behind the Window
Lighting turns the project from a craft into a Halloween focal point. 👻
Attach warm LED string lights behind the translucent backing.
Avoid spreading them evenly.
Instead, concentrate some lights toward the bottom and corners.
Uneven illumination feels more mysterious.
Another option is to place several battery-operated candles behind the window so that their flickering light becomes visible through the fake glass.
The shadows created by the cardboard grid make the structure appear much more substantial.
For an even more dramatic effect, hide a small amber or warm-white LED spotlight several feet behind the window.
The glow will illuminate silhouettes while keeping the frame dark.
Where to Display the Gothic Window
The project works beautifully behind a Halloween dining table.
Add black candlesticks, dried branches, antique-looking books, and dark flowers beneath it.
It can also become a front porch focal point when positioned in a covered area.
Another clever option is placing the cardboard structure inside a real window facing outward.
At night, the illuminated gothic shape becomes visible from the street.
In a living room, it can replace ordinary artwork temporarily during October.
The decoration is large enough to establish a Halloween theme without requiring dozens of smaller objects.
That is what makes this one of the strongest cardboard halloween decorations diy projects for people who want dramatic results from inexpensive materials.
🥈 Best 2 Cardboard Halloween Decorations DIY Giant Weathered Tombstones
Cardboard tombstones are a Halloween classic, but they often look obviously homemade because they are cut from a single flat sheet and painted one color.
The upgraded version uses layers, carved-looking details, realistic stone coloring, and strategic placement.
Done carefully, cardboard can imitate weathered cemetery stone surprisingly well.
These tombstones work especially well for covered porches, indoor Halloween displays, entryways, windows, fireplaces, or dry-weather garden displays.
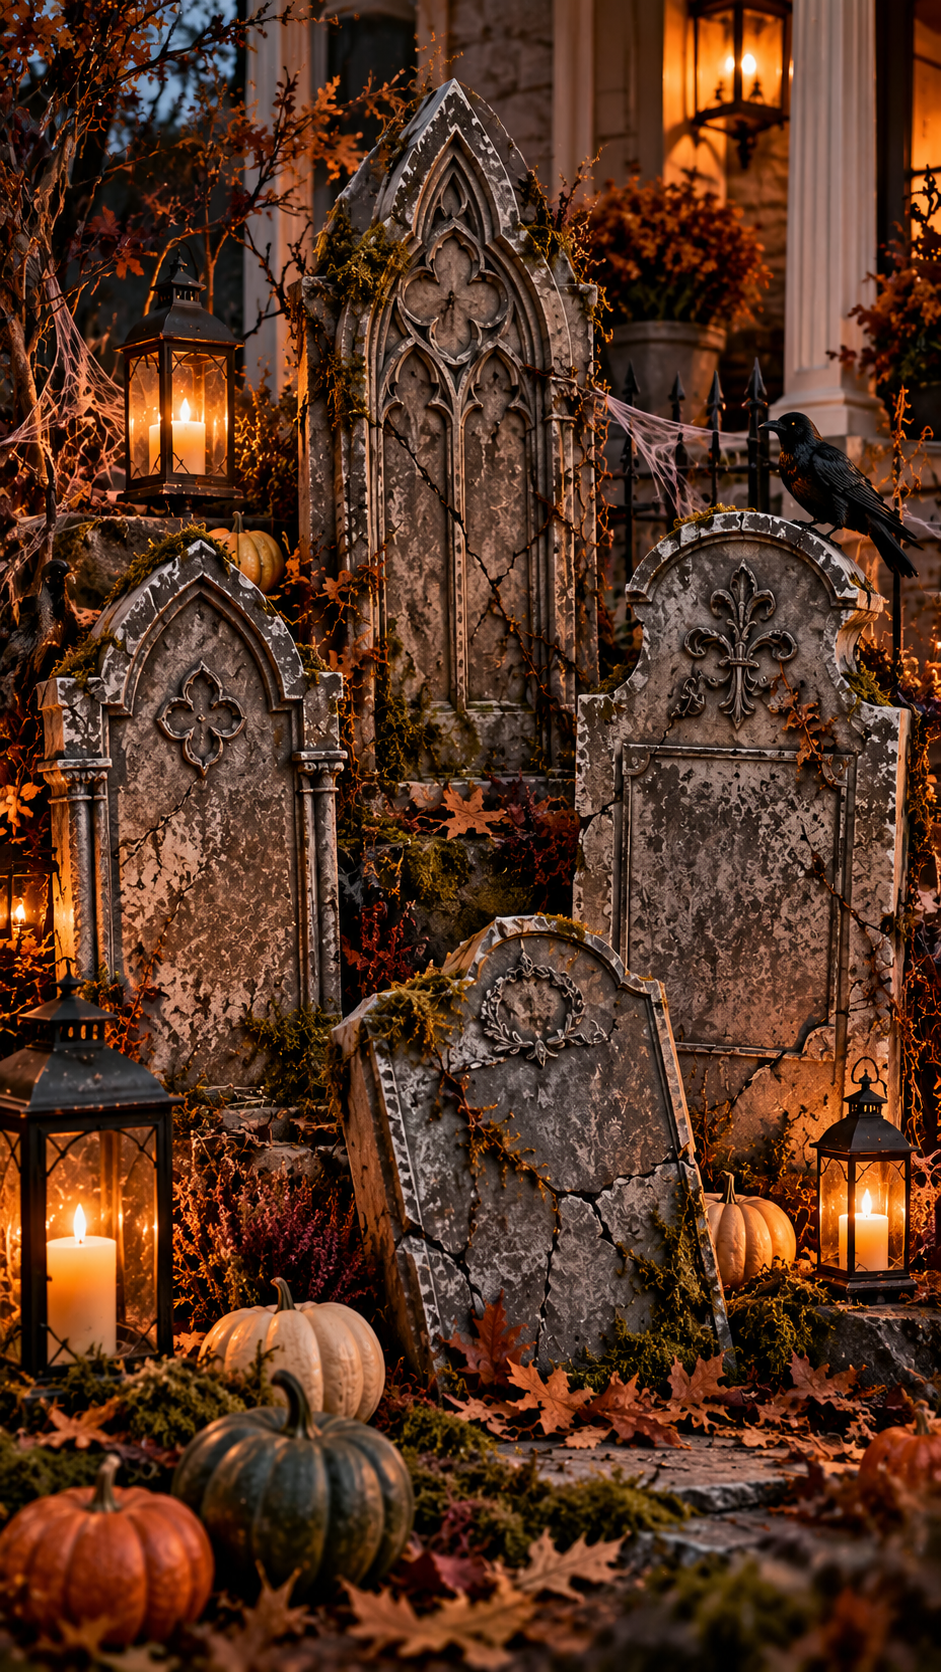
Build Thick Tombstone Shapes
Start by cutting two identical tombstone silhouettes.
Classic rounded shapes are easy, but mixing several designs looks more realistic.
Try one with a rounded top.
Create another with pointed gothic shoulders.
Make a third taller stone with a rectangular shape and small decorative peaks.
Glue the matching front and back pieces together around cardboard spacers.
Instead of keeping the tombstone completely flat, place strips of corrugated cardboard around the inner edge.
This creates a hollow box-like construction approximately three to five centimeters thick.
Once the second face is attached, the tombstone will look much more substantial.
The extra thickness also helps it stand.
Add Raised Lettering and Carved Details
Raised decorations are much easier than trying to carve cardboard.
Cut letters from thin cardboard.
Simple words such as RIP work, but decorative initials, dates, or fictional family names can look more sophisticated.
Keep lettering large and relatively simple because very thin cardboard details can disappear after painting.
Glue the letters onto the front.
Then add decorative borders.
Small strips of cardboard can create rectangular carved frames.
For a gothic version, add small arches or pointed motifs.
Skull shapes, ravens, vines, or simple floral ornaments can also be cut from thin cardboard.
The key is restraint.
One or two decorative elements usually look more believable than covering the entire surface.
Create Cracks Without Weakening the Cardboard
Old stone needs imperfections.
Instead of cutting completely through the cardboard, draw irregular cracks with a pencil.
Then lightly score the surface with a blunt tool or craft knife.
The cuts should remain shallow.
Paint dark lines inside the cracks later.
Create several branching cracks near corners and edges.
Avoid making every crack identical.
Real weathering tends to look random.
A damaged corner can also make the prop more convincing.
Cut a small uneven section away from one edge, then paint the exposed area darker.
Paint Realistic Faux Stone
A convincing stone finish requires several tones.
Begin with dark charcoal grey.
This becomes the shadow layer.
Once dry, sponge medium grey across most of the tombstone.
Leave some dark patches visible.
Add warm grey and muted taupe randomly.
Real stone rarely has one perfectly consistent color.
Finish with very light grey applied almost dry to the edges, raised lettering, and decorative details.
This technique is similar to dry brushing.
Only a tiny amount of paint should remain on the brush.
When dragged gently across the surface, the paint catches only the raised areas.
Suddenly the cardboard layers begin to look like carved stone.
Add Moss and Ground Details
A tombstone sitting alone on a floor often looks artificial.
The surrounding details help complete the illusion.
Place preserved moss or artificial moss around the base.
Add dry autumn leaves.
Small branches can lean against the stones.
For indoor displays, shredded brown paper mixed with leaves creates convincing ground texture.
A little Spanish moss hanging from the side can make the graveyard feel older, although it should be used sparingly.
Clusters of three or five tombstones generally look better than a perfect row.
Place some at slight angles.
Vary the heights.
The result should resemble an old forgotten graveyard rather than a retail display.
Create a Layered Mini Graveyard
For a truly dramatic arrangement, position the largest tombstone toward the back.
Place two smaller stones slightly forward.
Add crooked cardboard fencing behind them.
The fence can be created by cutting long vertical strips with pointed ends and attaching them to two horizontal supports.
Paint the entire structure black.
Then lightly brush the edges with muted silver or rust brown.
This creates the appearance of old iron.
Place several LED candles near the ground.
Warm light against grey cardboard creates striking shadows.
A twisted branch positioned behind the tombstones can add height.
Black paper ravens or bats can be attached to the branch.
The entire scene becomes much more immersive without requiring expensive props.
Add Foggy Cemetery Atmosphere Indoors
Atmosphere does not always require complicated equipment.
Place thin layers of white synthetic cobweb material around the ground.
Stretch it until it becomes almost invisible.
Do not leave thick clumps.
Soft material catching the light can resemble low fog in photographs or evening displays.
Sheer grey fabric also works.
Lay it loosely around the base and hide small LED lights underneath.
The subtle glow gives the cemetery a mysterious appearance.
For a fireplace display, arrange several tombstones at different heights in front of the hearth.
Add dark candles, dried branches, stacked antique-style books, and black fabric.
The effect can feel like a miniature theatrical set.
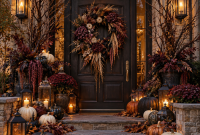
🥉 Best 3 Cardboard Halloween Decorations DIY Haunted Manor Entrance
The third idea is the most dramatic.
Instead of creating one decoration, build the illusion of an entire haunted entrance.
This project works beautifully around a front door, interior doorway, party backdrop, or porch.
The basic concept is to create cardboard architectural panels around the existing doorway so it appears to belong to an abandoned gothic manor.
The structure can be surprisingly lightweight because most of the visual effect comes from flat and layered cardboard rather than heavy construction.
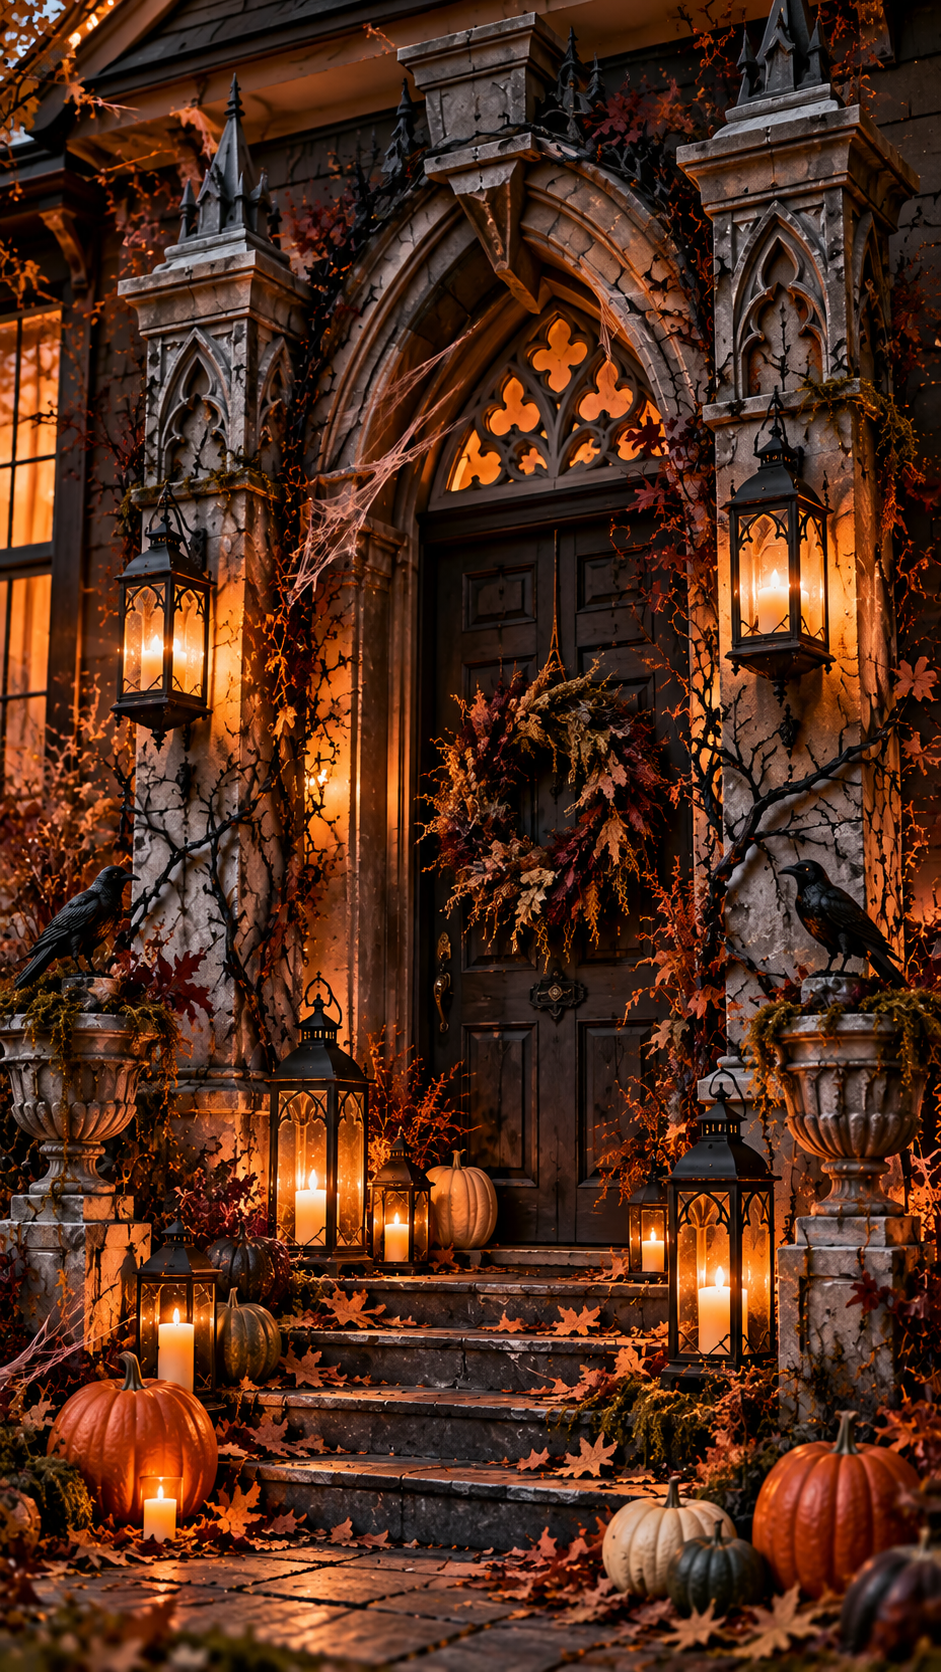
Frame the Door With Oversized Cardboard Stone Blocks
Start by cutting large rectangular cardboard panels.
These will become fake stone blocks.
Vary the sizes slightly.
Paint them individually using dark grey, medium grey, and warm stone colors.
Then attach them around the doorway using removable hanging methods appropriate for the surface.
Do not create perfect brickwork.
Large irregular blocks look older and more dramatic.
Overlap certain sections.
Add cracks with dark paint.
Highlight edges with pale grey.
The doorway will immediately begin to resemble stone architecture.
Create Tall Haunted Columns
Columns make the entrance feel much larger.
Cut long cardboard rectangles and fold each one into a shallow box.
A simple four-sided rectangular column is easier than attempting a round shape.
Create decorative bases using additional cardboard layers.
Add a wider strip at the bottom.
Place another near the top.
Then attach smaller rectangles or pointed gothic designs near the capital.
Paint everything in the same stone finish as the wall blocks.
Position one column on each side of the entrance.
The vertical shapes make ordinary doors look grander.
If the cardboard is too flexible, glue wooden skewers or additional folded cardboard strips inside the back.
Add a Gothic Arch Above the Door
The arch creates the strongest visual transformation.
Draw a wide pointed arch on cardboard.
Cut two identical pieces.
Layer them together.
Create a second smaller arch and attach it on top.
The stepped layers simulate carved architectural molding.
Paint the recesses very dark.
Highlight the outer edges with light grey.
From a distance, the cardboard will appear much deeper than it actually is.
Attach the finished arch above the doorway.
The existing rectangular entrance now appears to sit inside a gothic stone surround.
Make Cardboard Haunted Lanterns
Lighting should be incorporated into the design, but it must remain safe around cardboard.
Create lantern shapes from cardboard frames.
Cut four tall rectangular panels.
Cut large window openings in each.
Glue the panels into a box.
Add a cardboard roof.
Place translucent paper behind the openings.
Paint the exterior matte black.
Instead of real candles, place battery-powered LEDs inside.
Warm flickering lights behind translucent paper create the appearance of old glass lanterns.
Hang one lantern on each side of the entrance or place them on small platforms.
The lighting draws attention to the architectural cardboard details after sunset.
Add a Distressed Haunted Manor Sign
A large sign makes the display feel more complete.
Cut a long piece of thick cardboard.
Round or irregularly cut the edges.
Paint it dark brown.
Dry brush lighter tan streaks across the surface to imitate aged wood grain.
Add a fictional manor name using pale grey or cream lettering.
Examples might include Ravenwood Manor, Hollow Hill Estate, or Blackthorn House.
Keep the typography simple and elegant.
A little black paint around the corners creates aged shadows.
Hang the sign above or beside the entrance with dark twine.
Create Dramatic Cardboard Vines and Branches
Cardboard can even imitate twisted botanical forms.
Cut long irregular strips with pointed leaves.
Paint them charcoal, deep olive, or almost black.
Curl some pieces slightly before attaching them around the architecture.
Do not cover the entire doorway.
Allow the vines to emerge from corners and wrap partially around columns.
Real branches can also be combined with cardboard leaves.
This mix of materials often looks more convincing than using one material alone.
Add a few dried leaves or artificial dark foliage.
The entrance begins to feel abandoned and reclaimed by nature.
Finish With Layered Halloween Styling
The cardboard architecture should remain the dominant element.
Additional decorations should support it rather than compete with it.
Place several pumpkins near the base.
Use mostly natural orange, muted green, ivory, or dark red instead of extremely bright artificial colors.
Add one or two weathered cardboard tombstones nearby.
Lean several branches against the wall.
Place battery-operated lanterns at different heights.
A little stretched cobweb material can connect the columns and arch.
For a more elegant Halloween style, incorporate deep burgundy flowers and black foliage.
For a classic haunted manor effect, use dried branches and fallen leaves.
For a family-friendly version, add pumpkins and small ghost silhouettes.
The same cardboard architecture can support several different themes.
How to Make Cardboard Halloween Decorations DIY Look More Expensive
The biggest challenge with cardboard Halloween projects is avoiding the appearance of flat craft materials.
Several finishing techniques make an enormous difference.
Build in Layers
Depth creates realism.
Instead of drawing borders, cut separate cardboard strips and glue them on.
Instead of painting letters directly onto tombstones, cut raised letters.
Instead of creating one flat arch, stack several arch shapes.
Every additional physical layer creates real shadows.
Those shadows make the decoration look far more detailed.
Avoid Perfect Surfaces
Halloween décor often benefits from imperfection.
Old stone should have cracks.
Haunted wood should have uneven edges.
Ironwork should look slightly worn.
Architecture should appear aged.
A perfectly smooth cardboard surface can look artificial, while carefully introduced irregularities create character.
Use Multiple Paint Colors
Flat color is one of the main reasons DIY props look inexpensive.
Stone requires several greys.
Wood needs different browns.
Metal looks better when black includes subtle silver or rust accents.
Use a sponge to create random patterns.
Then finish with dry brushing.
The visual complexity hides the cardboard surface underneath.
Keep the Color Palette Controlled
Too many bright colors can make large DIY decorations feel chaotic.
Choose a limited palette.
A sophisticated Halloween combination might include charcoal, warm grey, deep brown, moss green, muted burgundy, ivory, and small touches of amber light.
Another strong palette is black, weathered grey, antique bronze, dried orange, and cream.
Keeping colors coordinated helps several individual DIY projects look like one complete display.
Use Lighting Strategically
Halloween decorations become dramatically more effective after dark.
Lighting does not need to be bright.
In fact, subtle light often looks better.
Hide warm LEDs behind gothic windows.
Place flickering LED candles beside tombstones.
Illuminate the base of columns.
Allow shadows to form naturally.
A single cardboard structure can look completely different once directional lighting creates highlights and darkness.
Indoor Versus Outdoor Cardboard Halloween Decorations DIY
Cardboard is naturally best suited to indoor displays and protected outdoor areas.
Moisture is its main enemy.
A perfectly painted cardboard tombstone can collapse quickly if exposed to heavy rain.
For outdoor use, place cardboard under covered porches, awnings, balconies, or recessed entryways.
Avoid allowing the bottom edges to touch wet ground.
Small wooden blocks, bricks, or plastic bases can raise decorations slightly.
Clear water-resistant craft sealers may offer limited protection against humidity and light moisture, but cardboard should still not be treated as permanently weatherproof.
For indoor decorating, the possibilities are much wider.
Cardboard props can surround fireplaces, frame windows, transform staircases, or create party photo backdrops.
Because the pieces are lightweight, large decorations can be created without introducing extremely heavy objects into the room.
How to Store Large Cardboard Halloween Decorations
One advantage of cardboard Halloween decorations is that many projects can be designed for flat storage.
Instead of permanently gluing every component together, attach some sections using removable fasteners, clips, or slots.
Columns can be constructed as foldable panels.
Gothic windows can lie flat.
Tombstones can be stacked.
Large doorway stones can be stored as individual pieces.
Label the backs of components before packing them away.
For example, write left column, right column, top arch, and lower stone panel.
Next Halloween, reassembly becomes much easier.
Store cardboard in a dry interior space.
Avoid garages or sheds with high humidity if possible.
Place large flat panels vertically rather than stacking heavy objects on top.
Properly stored painted cardboard decorations can often be reused for several seasons.
Easy Ways to Expand the Three Main Ideas
Once the gothic window, tombstones, or haunted entrance is finished, leftover cardboard can become smaller supporting decorations.
Cut bats in several sizes and arrange them across a wall.
Create silhouettes of crooked trees.
Make small gothic frames.
Cut old-looking directional signs pointing toward fictional places such as cemetery, crypt, manor, or haunted woods.
Create cardboard book covers for a Halloween bookshelf.
Build narrow coffin-shaped boxes.
Make fake boarded windows using cardboard strips painted like weathered wood.
Even small leftover scraps can become stone details or decorative trim.
Using scraps this way keeps the display visually consistent because every element shares similar paint colors and textures.
Which Cardboard Halloween Decoration Idea Is Best for Your Space
Choosing the right project depends largely on where the decoration will be displayed.
For apartments and smaller homes, the haunted gothic window is probably the easiest statement piece.
It occupies vertical wall space without requiring much floor area.
For fireplaces, party tables, or indoor entry displays, the giant weathered tombstones offer the most flexibility.
They can be rearranged every year and combined with pumpkins, branches, lanterns, and other Halloween decorations.
For a front porch or Halloween party entrance, the haunted manor doorway creates the greatest visual transformation.
It turns existing architecture into part of the decoration.
There is no need to build every project at once.
A single large piece combined with atmospheric lighting can often create more impact than dozens of small decorations scattered throughout a room.
Final Thoughts on Cardboard Halloween Decorations DIY
The best Halloween decorating ideas often depend more on creativity than budget.
Ordinary shipping boxes can become gothic windows, ancient cemetery stones, haunted architecture, lanterns, signs, and dramatic party backdrops with little more than careful cutting, layered construction, paint, and light.
Among these Top 3 cardboard halloween decorations diy ideas, the gothic window offers the easiest balance between effort and visual impact. The layered tombstones are especially versatile, while the haunted manor entrance provides the biggest transformation for anyone who wants a truly memorable Halloween display.
The strongest approach is to think large.
Instead of using cardboard only for tiny crafts, treat it like lightweight architectural material.
Build oversized shapes.
Add physical depth.
Paint several layers of realistic color.
Introduce controlled imperfections.
Then use warm LED lighting to emphasize the shadows.
With those techniques, cardboard stops looking like packaging material and begins to resemble stone, wood, metal, and old architecture.
That is what makes these projects so useful for Halloween. 🎃
They are inexpensive enough to experiment with, lightweight enough to move around easily, customizable for almost any decorating style, and dramatic enough to become the centerpiece of an entire Halloween setup.
A pile of unused boxes might not look particularly inspiring at first.
But with a craft knife, dark paint, a few layered details, and the right lighting, those boxes can become an atmospheric haunted world that looks far more expensive than it really is.
Related posts:

Top 3 Halloween Window Painting Ideas That Will Make Your House Look Unforgettable
Top 3 DIY Outdoor Halloween Decorations That Will Make Your Yard Look Unbelievably Expensive
Best 3 Office Halloween Decorations That Make Your Workplace Look Unforgettable
Top 3 Homemade Halloween Decorations That Make Your Home Look Expensive
Top 3 Halloween Door Decorations That Make Your Entrance Look Expensive and Unforgettable
Top 3 Dollar Tree Halloween DIY Ideas That Look Shockingly Expensive