
When the weather is nice, it is hard to stop yourself from opening the doors. Letting fresh air comes to your house can’t be a disaster, unless for tiny bugs. Regular door becomes their huge portal to transfer to your house. Why don’t make screen door instead of buying tons of bugs repellent?
Materials:
Make sure to prepare these materials before jumping to the process
- Plain board (1 x 10x 8) 2 pcs
- Door hinges two pcs
- Door handle 1 pcs
- Insect screen
- Trim corner
- Pneumatic closer or spring
- Magnetic catch (optional material)
- Ruler (60 cm)
- Pencil for marking
- Pocket Hole Plugs
- Wood Glue
Tools:
- Drill
- Table Saw
- Miter Saw
- Staple Gun
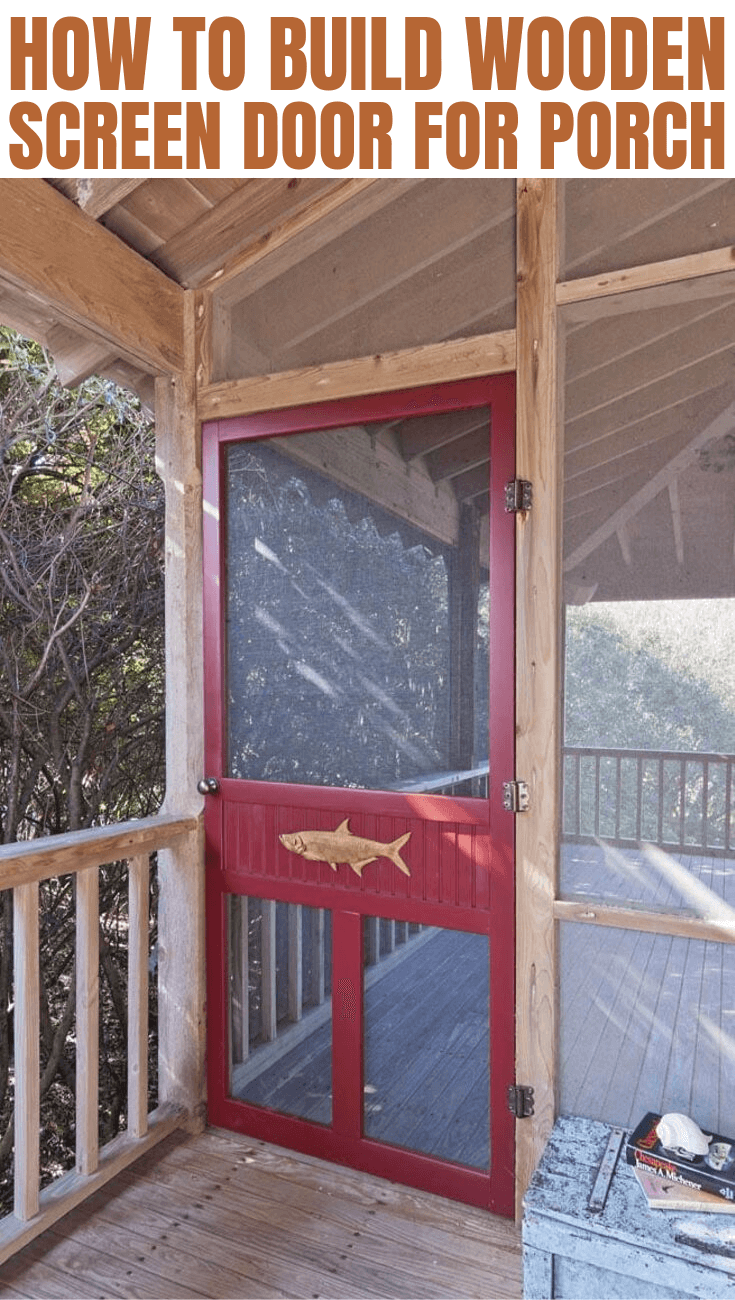
How to Build Wooden Screen Door Porch Steps:
1. Cutting Board
Building a screen door should always start from the dimensions. Grab pencil and ruler then start lining up. It will be easier to start from the width and length. Next, move to the inner square. Don’t forget to add triangles inside the square. Done measuring? Proceed to cutting then.

If the dimension given doesn’t fit to your house, then feel free to make adjustment. You could always use existing dimensions as reference.

2. Drill Some Screws
Pieces of boards are ready. It is time to make something that could join them together. For this DIY project, take the easiest way: drilling pocket holes. First, install the drill on the edge of board. Make sure they are clasped tightly, so the drill could go in smoothly.

Bring drill to the hole and turn on the machine. Push drill gently until it reaches its hilt. Repeat similar actions to another hole. Put these screws in every corner and any other place that need to be joined together.
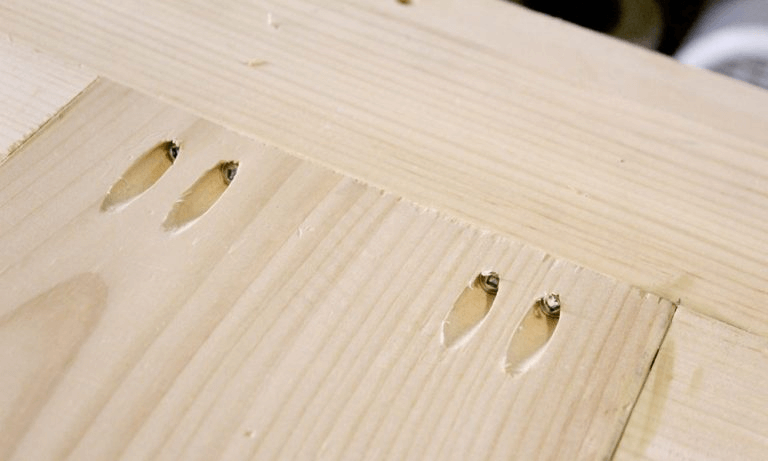
3. Cover Those Joints
After drilling the boards, you will realize that it leaves visible holes. Cover those holes with pocket holes plug. Grab one plug and apply some wood glue to the tip that will go inside the hole. Push the plug to the hole and let it sit for several minutes to dry. Repeat similar process to the other holes.


4. Install Triangle Insert
Don’t forget those triangles! They help your door to be stronger and firmer. Leave the drill alone and take nail and hammer instead. Drill tool has to be clasped to something, but triangle location is so difficult. If you want to double its strength, apply wood glue on its sides before nailing it to the frame.

5. Attach Screen
Next, bring your screen to working table. Lay it on top of screen door frame. If you have a partner, ask them to stretch screen tightly on both sides. Then, you stapled the screen to board using staple gun.

If you work alone, start from one corner then use another hand to pull the screen. Repeat the process until the screen covers inner square of door frame.
Take scissors and cut excessive screen. For better result, cover staples using construction adhesive tape. Let it sit for a night to dry.

6. Install Hinges
Before installing the door, make sure to install the hinges. If there is gap between the door screen and doorway, you just need to make small segment. Put some glue on it and press onto doorway. This way, door screen will be stronger. You could also drill the segment if you want. Install hinges on the doorway, not on the door screen. It makes stronger door screen.

7. Put On Door Accessories
Your door is not yet ready. Don’t forget to screw and install some accessories to the screen door. Start from something basic: the door handle.

While working on handle, put every small screw and any other handle parts close to you. Start from the inner part first. Make sure you dig enough space for it. Now connect it to handle. See manuals if you need help.
Another accessory you have is magnetic stop. Place it on the bottom, on the other side of hinge. Screw it to the door.
Read also: BEST FURNITURE IDEAS FOR PORCH DECORATION AND SETTING.
8. Attach Screen Door
Last step to do is attaching your screen door. Before screwing hinges, make sure you have similar gaps on all sides. To make your job easier, cut several small woods with similar consistency. Measure it properly, since you don’t want to make it too thick.
Put these woods on every edge. Now screw those hinges. Slowly pull out your wood insert under the door. Swing the door. If the door doesn’t make cracking sound or bump into something, then your job is finished.

Tips How to Build Wooden Screen Door for Porch:
How was the process of your DIY project? Some of you might get some difficulties while trying to make the door. There are some tricks to make your job even easier.
1. Use Both Saws.
Take miter saw to get long sides of the door frame. It has steady handle and strong machine. For the other parts, table saw is more convenient. If you are not sure how to use it, better try on unused board first. This way, you reduce the chance to fail.

2. Trim Screws
You are working with lots of screws. Sometimes, they are longer than the board used for door frame. Just like visible holes, these protruding screws are not good to look at. Best way to make them prettier is by trimming.
Hold door frame using vise. You could always ask your partner to hold the door too. Turn on cutting machine and slowly go on those protruding screw ends. If necessary, you could repeat the process so these ends are level to door frame.

3. Paint Screen Door
Initial reason to build screen door is for functional task; letting the air in while giving no space for bugs to barge in. What about painting it with your favorite color? If you want to paint it, then do it before attaching screen. Make sure the paint is dried properly. Otherwise, your finger print will be stamped anywhere.
4. Wear Safety Goggle
It might not be a tip to make your job easier, but to keep you safe. There are lots of jobs to do: sawing, drilling and trimming. Wearing safety goggle will prevent any fine dust go into your eyes. Sounds good?


